Picture this: your basement drain backs up on a Sunday morning, and your contractor tells you the sewer line needs to be replaced. The old solution meant a crew tearing up your driveway, your lawn, and possibly your landscaping for days. Today, most Maine homeowners have a better option. CIPP lining, which stands for cured-in-place pipe lining, lets technicians repair a failing sewer line from the inside out, with no major digging required. This guide walks you through every stage of the process, from understanding what CIPP is, to preparing your property, watching the installation unfold, and knowing what to do if something doesn't look right afterward.
Table of Contents
- What is CIPP lining and why choose it?
- Preparing for a successful CIPP lining project
- Step-by-step CIPP lining installation process
- Troubleshooting and common pitfalls
- Expert insight: CIPP lining's real impact in Maine's unique environment
- Connect with Maine's CIPP lining experts
- Frequently asked questions
Key Takeaways
| Point | Details |
|---|---|
| Non-invasive solution | CIPP lining repairs sewer pipes without digging up your yard. |
| Fast installation | Most projects are completed in just one day with minimal disruption. |
| Long-term durability | Properly installed CIPP liners can last 50 years or more in Maine conditions. |
| Simple preparation | Homeowners only need to clear access and provide pipe details to ensure a smooth process. |
| Trusted for Maine homes | CIPP lining is especially effective for Maine’s old pipes and challenging winters. |
What is CIPP lining and why choose it?
Many Maine homeowners are turning away from traditional sewer repair because the disruption and cost are simply too high. That's where trenchless sewer technology comes in. CIPP lining is a repair method where technicians insert a flexible, resin-soaked felt tube into your existing damaged pipe. Once it's positioned correctly, the resin is cured using hot water, steam, or UV light, hardening into a smooth, jointless new pipe surface inside the old one. No trenches. No heavy equipment tearing up your property.
Compared to traditional dig-and-replace methods, CIPP offers clear advantages:
| Factor | Traditional excavation | CIPP lining |
|---|---|---|
| Property disruption | High (full trench) | Minimal (small access points) |
| Project duration | 3 to 7 days | Usually 1 day |
| Landscaping impact | Significant | Nearly none |
| Long-term durability | Depends on new pipe | Up to 50 years |
| Cost | Higher overall | Lower total cost |
For Maine specifically, CIPP's speed is a major advantage. Winters here are long and unpredictable. A repair that can be completed in a single day, regardless of season, protects you from extended exposure to frozen ground conditions and the added expense of frost removal. CIPP lining eliminates the need for large-scale excavation, which is especially valuable when your property has mature trees, stone walls, or a finished driveway.
CIPP works best in these situations:
- Root intrusion: Tree roots that have cracked or infiltrated the pipe
- Pipe corrosion: Older cast iron or clay pipes showing internal decay
- Cracks and fractures: Structural damage from ground movement or freeze-thaw cycles
- Pipe deformation: Sections that have shifted or partially collapsed
- Joint separation: Gaps between pipe sections allowing soil infiltration
Pro Tip: If your home was built before 1980 and you've had repeated slow drains or backups, your sewer lateral (the pipe connecting your home to the municipal main) is a strong candidate for CIPP. Don't wait for a full blockage to find out.
When you compare trenchless vs. excavation costs, CIPP consistently delivers lower total project costs when you factor in landscaping restoration, concrete replacement, and lost time.
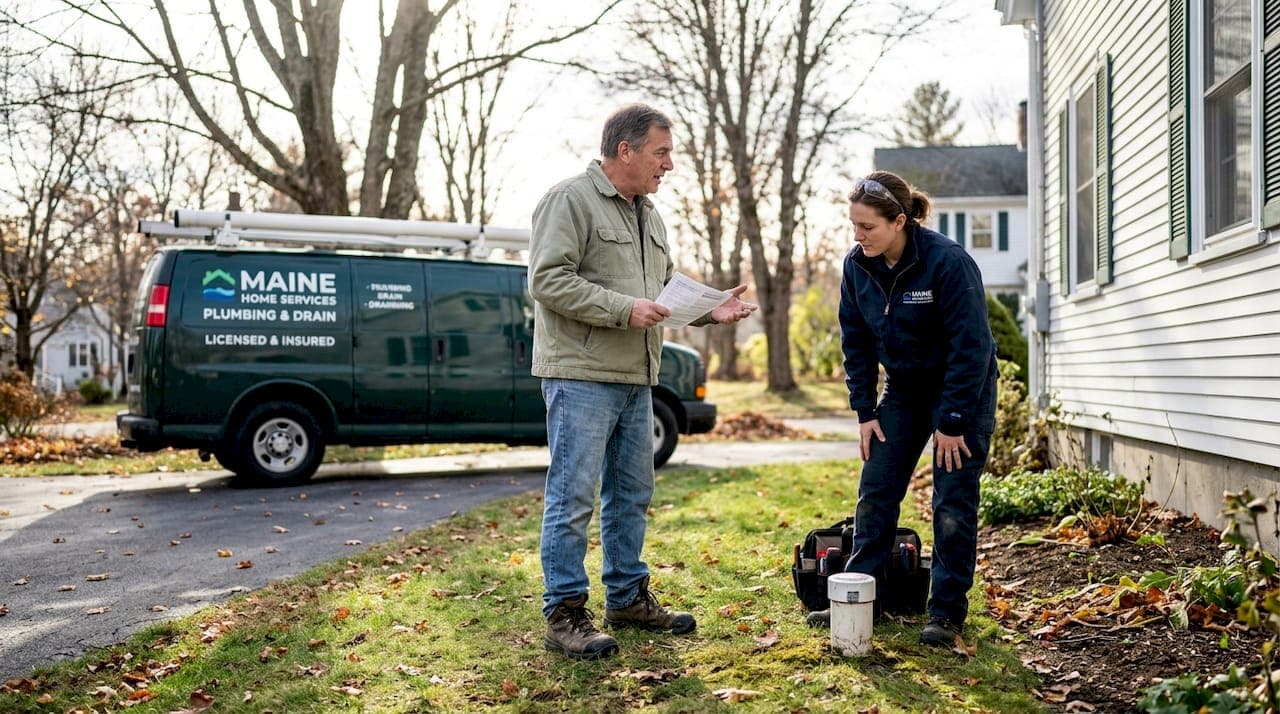
Preparing for a successful CIPP lining project
Now that you understand CIPP and its advantages, the next step is making sure your property is ready for a smooth repair. Good preparation on your end directly affects how quickly and cleanly the job gets done.
First, technicians need clear access to your sewer clean-out, which is the capped pipe opening that provides direct entry to your sewer line. It's usually located in your basement, crawl space, or near the foundation outside. If you don't know where yours is, let your contractor know in advance so they can locate it during the site visit.

Here's a standard homeowner prep checklist before your CIPP appointment:
| Task | Details |
|---|---|
| Locate the clean-out | Mark it clearly for the crew |
| Clear the work area | Remove vehicles, equipment, and debris |
| Secure pets | Keep dogs and cats indoors or in a separate area |
| Unlock gates | Ensure side yard and backyard access |
| Notify neighbors | Especially if street parking is needed |
| Gather pipe records | Age, material, and any known blockage history |
You should also share what you know about your pipe's history. Knowing the pipe material (clay, cast iron, PVC) and approximate age helps the crew choose the right liner thickness and resin type. If you've had recent blockages or a camera inspection, share those results too.
Common obstacles that can slow things down include frozen ground in late winter, dense landscaping directly over the pipe path, locked or narrow gates, and parked vehicles blocking the work zone. Addressing these before the crew arrives keeps the project on schedule.
Proper site preparation and access are essential to avoid delays, and reviewing before-and-after project photos can help you visualize what the crew will need and what your property will look like when the job is done.
Pro Tip: Take clear photos of your yard, driveway, and any landscaping near the pipe path before the crew arrives. If you ever need to file an insurance claim or reference the original condition, you'll have dated documentation ready.
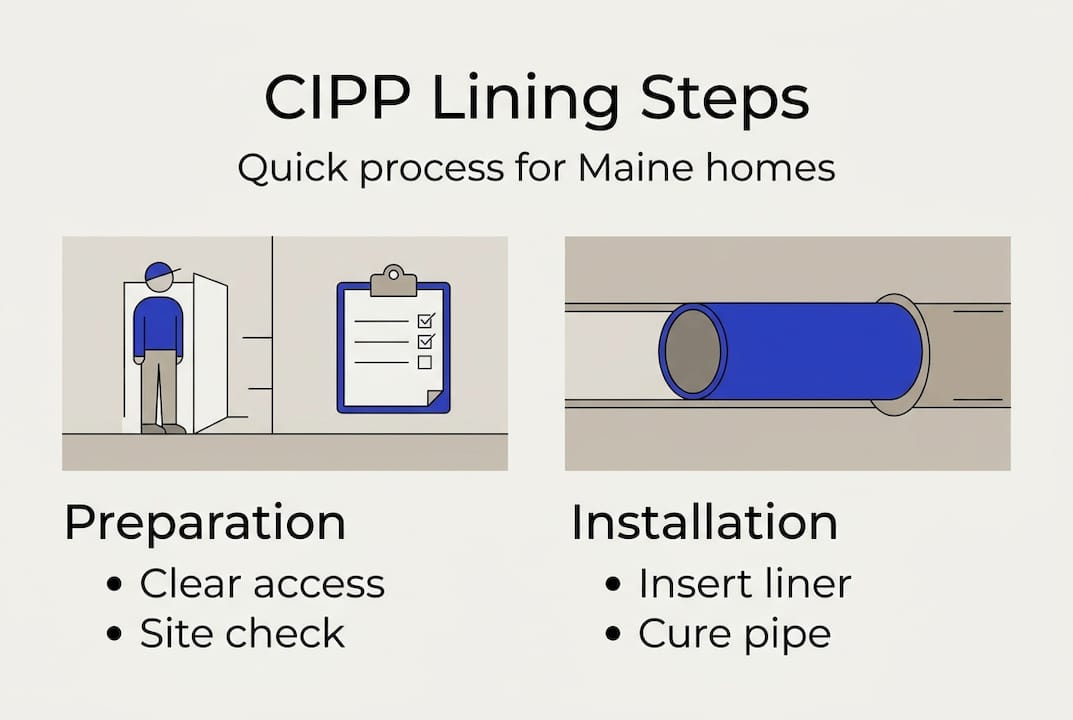
Step-by-step CIPP lining installation process
With your property ready, here's exactly how the CIPP lining is installed, step by step.
- Camera inspection: A small waterproof camera is fed through the pipe to assess the damage, measure the pipe diameter, and confirm the liner will fit correctly.
- Pipe cleaning: Technicians use hydro jetting (high-pressure water) to clear roots, grease, and debris. The pipe interior must be clean for the resin to bond properly.
- Liner preparation: The felt liner is saturated with epoxy or polyester resin and sized to match your pipe's length and diameter.
- Liner insertion: The resin-soaked liner is pulled or inverted into place through the clean-out access point.
- Curing: Hot water, steam, or UV light is applied to harden the resin. This is the step that transforms the soft liner into a rigid, smooth new pipe surface.
- Final camera inspection: A second camera pass confirms the liner cured correctly, with no wrinkles, gaps, or uncured sections.
- Service restoration: Technicians reopen any lateral connections and confirm flow is restored before leaving.
| Installation step | What you'll notice at home |
|---|---|
| Camera inspection | Technician at clean-out with monitor |
| Hydro jetting | Water truck, some noise |
| Liner insertion | Quiet, minimal visible activity |
| Curing | Steam or equipment hum |
| Final inspection | Camera pass, then crew packs up |
Important: Avoid using any drains, toilets, or water fixtures during the curing phase. Your technician will tell you exactly how long this window lasts, typically two to four hours. This protects the liner from shifting before it fully hardens.
CIPP can often restore a failing sewer line within a single day, which means most homeowners experience minimal disruption to their daily routine. If your pipe has unusual bends, offset joints, or a particularly severe blockage, the timeline may extend slightly, but your contractor should communicate this clearly before work begins.
Troubleshooting and common pitfalls
Once installation is complete, most jobs go perfectly. But it's smart to know how to spot and address potential issues early.
The most common CIPP problems stem from four causes: incomplete curing, inadequate pipe cleaning before lining, adverse weather affecting resin performance, and limited installer experience. Each of these is preventable when you choose a qualified contractor and ask the right questions upfront.
Watch for these red flags after installation:
- Slow drains that persist more than 24 hours after the job
- Sewer odors inside or near your home
- Gurgling sounds from toilets or floor drains
- Visible wet spots in the yard along the pipe path
- Drain backups within the first few weeks
Before hiring any contractor, ask these questions:
- How many CIPP projects have you completed in Maine?
- What resin system do you use, and how is curing verified?
- Do you perform a post-installation camera inspection?
- What does your warranty cover, and for how long?
- Can you provide references from similar residential projects?
Addressing minor issues quickly ensures the longevity of a new pipe lining. If something feels off after your repair, don't wait. Contact your installer and request a follow-up camera inspection. Most reputable contractors will respond promptly, especially if you're within the warranty period.
For guidance on whether your homeowner's policy covers any part of the repair, check sewer repair insurance tips specific to Maine properties.
Pro Tip: Schedule a follow-up camera inspection at the one to two year mark after your CIPP repair. This is especially important after a hard Maine winter, when ground movement can reveal any weak spots in the lining before they become larger problems.
Expert insight: CIPP lining's real impact in Maine's unique environment
Most guides focus on the technical steps of CIPP lining and stop there. What they understate is how much Maine's specific conditions shape the outcome of your repair.
Rocky soil and frost lines that reach deep into the ground make traditional trenching far more expensive here than in warmer states. The cost of breaking frozen ground, managing rocky excavation, and restoring a yard afterward can easily double a repair budget. CIPP sidesteps all of that.
Older neighborhoods in Portland, Bangor, and Augusta often have tree-lined streets with sewer laterals running directly under mature root systems. In these cases, CIPP doesn't just match a new pipe; it often outperforms one. The seamless, jointless interior surface created by cured resin gives tree root intrusion virtually no entry point, unlike segmented new pipes that can separate at joints over time.
What most contractors won't tell you is that the quality of the post-installation camera inspection matters as much as the installation itself. After a tough Maine winter, a quick visual check can catch early deformation before it becomes a full failure. Choose a contractor who makes that follow-up inspection part of their standard process, not an upsell.
Connect with Maine's CIPP lining experts
If you're ready to move forward or just want to see what a finished CIPP project actually looks like, Trenchless Maine makes it easy to take the next step.

With over 50 years of combined expertise and a track record of completed projects across Maine, Trenchless Maine brings local knowledge and proven methods to every repair. Our team understands Maine's infrastructure, soil conditions, and seasonal challenges in ways that out-of-state contractors simply don't. You can learn about CIPP technology in detail, review our full list of services including hydro jetting and camera inspections, or go straight to requesting a free quote for your property. Real results, no guesswork.
Frequently asked questions
How long does CIPP lining installation take?
Most CIPP projects in Maine take one day from start to finish, though pipe condition and access complexity can affect the timeline. CIPP can often restore a failing sewer line within a single day.
Is CIPP lining safe for old sewer pipes?
Yes, CIPP lining is specifically designed to reinforce aging pipes from the inside without removing them, and it works safely with most residential pipe materials. CIPP lining reinforces existing pipes with minimal disturbance.
What should I do if I smell odors after installation?
Persistent odors after installation usually point to a minor issue such as an unsealed lateral connection; contact your installer right away for a follow-up inspection. Addressing minor issues quickly ensures the longevity of a new pipe lining.
Does CIPP repair affect my yard or landscaping?
CIPP repairs use only small access points, so your lawn, garden, and hardscaping stay largely untouched throughout the project. CIPP lining eliminates the need for large-scale excavation.
How long does a CIPP lining last?
A properly installed CIPP lining is rated to last 50 years or more, making it one of the most durable sewer repair options available. CIPP lining technology is rated for decades of service.